A Compact Laboratory Oven may look simple: a steel chamber, a digital display, and a rack of samples. Choosing one is less simple. The right model must match the work, not just fit the bench. Chamber volume, temperature range, uniformity, recovery time, and airflow can affect results. So can door clearance and the distance to a nearby wall. Small details matter.
A useful selection principle is: “Choose for the sample, the method, and the space—not the brochure.” This is an editorial guiding line, not a verified quotation from a named industry expert. A credible recommendation should be traceable to a real specialist and source; inventing an attribution would weaken this guide. Buyers should confirm performance claims against published specifications and, where needed, documented test data.
The tips ahead examine seven practical checks, from usable chamber dimensions to controls, calibration support, and cleaning access. Picture a tray sliding past a crowded shelf, or a hot door opening beside a narrow aisle. These are ordinary moments, yet they can expose a poor fit. No checklist removes every trade-off. A larger chamber may take more space and energy; tighter temperature control may cost more. The best choice depends on the samples, workload, and operating routine. Measure carefully. Ask specific questions. Leave room to reconsider.
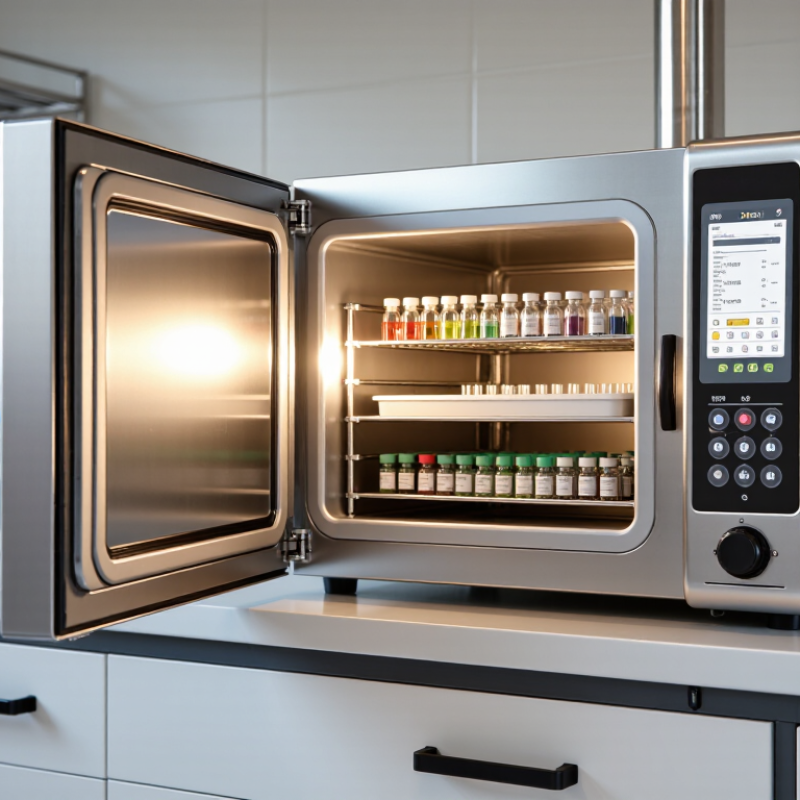
Start with the actual work, not the oven’s advertised chamber volume. List the materials, container sizes, batch count, target temperature, and required drying or heating time. Then measure the largest load, including shelves and space between items. Air needs room to circulate. Measure the load.
A compact oven that fits one tray may fail when containers block airflow or a second batch is added. Allow clearance around each item, and size for the busiest routine day rather than an occasional ideal load. This estimate will not be perfect; record real batch sizes for a few weeks and revise it.
The U.S. Environmental Protection Agency’s Labs21 benchmarking materials report that laboratories can use five to ten times more energy per square foot than typical offices. That figure is not specific to ovens, but it makes oversized, routinely underfilled heated space worth questioning.
Check the chosen oven’s loaded performance, not just its empty-chamber specifications. ASTM E145 provides a professional framework for evaluating gravity-convection and forced-ventilation ovens; confirm the relevant temperature and performance requirements for your process.
If samples vary in size, test a representative mixed load and note the usable shelf area. A little unused space is sensible. Too much costs energy.
A compact oven’s temperature range should match the actual process, not an impressive catalogue maximum. Check the lowest and highest setpoints you use, then leave room for ramp-up and recovery after the door opens. A few degrees matter. For drying samples, a narrow working range may be more useful than a high maximum temperature you rarely need. ASTM E145 provides a recognized framework for evaluating gravity-convection and forced-ventilation ovens; compare test conditions when reviewing published performance, since an empty chamber may behave differently from a loaded one.
Uniformity and control accuracy are not interchangeable. Uniformity describes temperature differences across the chamber; accuracy describes how closely the displayed or set temperature matches a reference. Ask for a chamber map at your working temperature, including sensor locations and test conditions. NIST Technical Note 1297 explains that expanded uncertainty with a coverage factor of 2 corresponds to approximately 95% confidence. That’s useful context when assessing calibration data, but it is not a guarantee of oven performance. Check whether the stated accuracy includes measurement uncertainty. It often doesn’t. I would also verify recovery time with a representative load; a small oven can look stable while empty, then drift once shelves are full. That detail is easy to overlook.
Heating method and airflow should be considered together. ASTM E145, Standard Specification for Gravity-Convection and Forced-Ventilation Ovens, distinguishes natural and forced-air designs and sets out temperature-performance tests. Forced airflow can help temperatures recover after the door opens and reduce differences between shelf levels. But it may disturb powders, lightweight materials, or loosely covered samples. Not always the better choice. Gravity convection is gentler, though temperature differences may persist longer in a tightly packed chamber.
Match the design to the sample and the way you load the oven. For heat-sensitive or lightweight materials, check whether fan speed is adjustable and whether shelves block airflow. For routine drying, compare temperature-uniformity and recovery data from a loaded-chamber test, not just the controller’s setpoint. Ask for the test conditions, probe locations, and calibrated instrument details; otherwise, the numbers are hard to interpret. EURAMET Calibration Guide No. 8 offers guidance on thermocouple calibration, a useful reference when reviewing temperature measurements. Small details matter. I would also map temperatures after rearranging shelves or changing the load. That step is easy to skip, and I may be overcautious, but compact ovens can respond noticeably to changes in loading.
Check Bench Space, Power Needs, and Installation Requirements
Tip 1: Measure the bench, not just the oven chamber. Record the unit’s full width, depth, and height, then allow room for the door to open and for service access. Measure twice. A tight fit may look acceptable on paper, but it can block airflow or make routine cleaning awkward.
Tip 2: Check the electrical supply before ordering. Compare the oven’s voltage, current, and plug requirements with the outlet and circuit available at the bench. Ask facilities staff to confirm circuit capacity, especially when other equipment shares it. The U.S. Department of Energy’s Labs21 program notes that laboratories can use five to ten times more energy per square foot than offices. That makes a unit’s power draw worth checking, not guessing.
Tip 3: Review installation details, including clearance around hot surfaces, ventilation, and the route from receiving area to bench. A narrow doorway or low shelf can derail an otherwise sensible choice.
Tip 4: Confirm the bench’s load rating and stability. Compact does not always mean light.
Tip 5: Match the oven’s usable interior space to the largest vessel you actually expect to heat, leaving room for safe air circulation. Small details matter. Finally, document the measurements and electrical checks; assumptions are easy to miss during installation.
A compact laboratory oven can sit close to benches, power outlets, and frequently handled samples, so check its safety features before comparing capacity. Look for independent over-temperature protection, a clear alarm, and a door that closes securely. The exterior should remain reasonably cool during operation, but verify this in the equipment documentation rather than assuming it. Small rooms matter. Leave the clearance specified by the manufacturer, and keep vents unobstructed. A crowded bench can turn a minor oversight into a real hazard.
Calibration deserves equal attention. Ask whether the temperature display can be checked against a traceable reference thermometer, and confirm the recommended interval in the manual. For a practical check, compare readings at several points inside the chamber; one sensor near the door may not reveal uneven heating. Record the setpoint, measured temperatures, date, and operator. Keep those records. They help identify drift before it affects work. Maintenance should be manageable: inspect the door seal for cracks, clean spills promptly, and check fans and vents for dust. I have seen teams postpone simple checks because the oven seemed stable. That is not proof. A missed cleaning step can also become a habit, especially when the unit is tucked beneath a shelf.
| Tip | What to Evaluate | Practical Check | Why It Matters |
|---|---|---|---|
| 1. Check independent over-temperature protection | Look for an over-temperature limiter or cutoff that operates separately from the primary temperature controller. Check how an alarm or fault is indicated. | Review the operating manual and confirm the specified response to a sensor fault or temperature overshoot. Do not rely on a display alarm alone as a substitute for an independent cutoff. | Independent protection can reduce the risk of uncontrolled heating if the main control system fails. Required safeguards depend on the oven and its application. |
| 2. Assess materials and intended use | Confirm that the chamber, shelves, seals, and wiring materials are suitable for the temperatures and substances involved. Check any restrictions on flammable, volatile, corrosive, or biologically hazardous materials. | Compare the oven’s stated use and safety instructions with your process, sample containers, and local laboratory procedures. | A standard laboratory oven is not automatically suitable for every material or hazardous process. |
| 3. Match capacity to usable space | Compare internal chamber dimensions, shelf spacing, shelf load limits, and usable volume with the size and quantity of typical loads. | Allow space around samples for the airflow pattern specified by the manufacturer; avoid choosing capacity based only on the external footprint. | Overcrowding can obstruct airflow and contribute to uneven heating. A compact unit should still accommodate the actual workload. |
| 4. Evaluate temperature performance | Review the specified operating range, stability, and temperature uniformity, noting the test conditions and whether results apply to an empty or loaded chamber. | Compare the stated performance with the temperature tolerance required by your procedure. For critical work, assess performance with a representative load. | Setpoint accuracy, temperature stability, and spatial uniformity are different characteristics; each may affect process results. |
| 5. Plan calibration and verification | Check whether the controller can be calibrated and whether the manufacturer provides a calibration procedure or service information. | Use a suitable reference thermometer with current calibration traceable to recognized standards. Verify temperatures at relevant chamber locations and document results according to your quality system. | Routine verification helps identify measurement drift. The appropriate interval and acceptance limits depend on use, risk, and applicable quality requirements. |
| 6. Review airflow and controls | Determine whether the oven uses natural or forced-air convection and review the available controls, timers, alarms, and any data-recording features. | Confirm that the airflow type suits the samples and that the displayed settings and records support the required workflow. | Air movement affects heat distribution and may affect delicate or lightweight samples. Useful controls can make operation and process review more consistent. |
| 7. Estimate maintenance and service needs | Review cleaning instructions, recommended inspection tasks, replacement parts, ventilation clearances, and the availability of technical support. | Check that shelves and chamber surfaces can be cleaned using approved methods, and include routine inspection and calibration checks in the maintenance plan. | Accessible cleaning and clear service guidance can reduce downtime and help maintain reliable operation over the oven’s service life. |
List your materials, container sizes, batch count, target temperature, and heating time. Measure the largest loaded setup, including shelves and gaps. Measure the load.
Containers can block airflow, and a second batch may not fit. Check usable shelf space with a representative mixed load. An empty chamber tells only part of the story.
Leave clearance so air can circulate around each item. Keep vents unobstructed and follow the specified clearance around the oven. A crowded bench matters.
Size the oven for a busy routine day, not an occasional ideal load. Record real batch sizes for a few weeks, then revise your estimate. It may still be imperfect.
Look for independent over-temperature protection, a clear alarm, and a door that closes securely. Check documentation for exterior temperature details rather than assuming the unit stays cool.
Compare the display with a traceable reference thermometer. Check readings at several chamber locations, since one sensor near the door may miss uneven heating.
Record the setpoint, measured temperatures, date, and operator. Keep those records. They can help reveal temperature drift before it affects work.
Inspect the door seal for cracks, clean spills promptly, and check fans and vents for dust. A stable-looking oven is not proof that checks can be skipped.
Choosing a Compact Laboratory Oven begins with understanding the tasks it will perform, such as drying, heating, or conditioning samples. Estimate the size and number of items processed at one time to select a chamber with suitable capacity without using more bench space than necessary. Then compare the oven’s temperature range, temperature uniformity, and control accuracy to make sure they suit your procedures. Consider whether natural or forced-air circulation is appropriate, since airflow can affect heating consistency and sample handling.
Before purchasing, check the available bench space, electrical supply, ventilation, and installation requirements. Review practical safety features, including over-temperature protection and clear operating controls. Finally, consider how often the oven will need calibration, cleaning, and routine maintenance. A careful comparison of these factors can help you choose an oven that fits your workspace, supports reliable results, and remains straightforward to operate over time.

XUD Ovens